How to Add End-to-End Tests to Your React Project

As developers, we’re often faced with situations that require us to move fast and hopefully not break things. Sometimes this will seem like an unreasonable and insurmountable task. We can do things to improve our chances of success, though. In my last How to Migrate your React Project to TypeScript, we talked about using TypeScript to ensure reliability. In this post, we’ll talk about adding Cypress for End-to-End testing in your React project to help ensure that you’re shipping code that doesn’t break your project.
5 Reasons to Add End-to-End Testing
There are a lot of reasons–including the ones above–to migrate to TypeScript, but in case those didn’t convince you, here are five more:
Ensures what you expect to happen in your code happens;
Provides an onboarding opportunity for new contributors;
Decreases bugs in your code;
Allows you to feel confident in your code;
Decreases time to prod.
Getting Started
Since we’re building on an existing project, here are some resources to familiarize yourself with:
The first thing we want to do is get the app running as is so we can ensure that we won’t be making any breaking changes as we upgrade.
Run the React Project
Clone the repository.
Create a Deepgram API Key with an admin or owner role - get it here.
Create a file called .env and add DG_KEY='your-API-key'
Run npm i in your terminal
Run npm run start in your terminal
Run node server/server.js in your terminal
If it doesn’t automatically open, navigate to http://localhost:3000/. You should see the project running.
Adding Cypress for End-to-End Testing
Lucky for us, Cypress can be quickly added to your project and has excellent documentation, which decreases friction if you’re learning tests for the first time. To add Cypress, navigate to your terminal with the project open, and run npm install cypress . If you’re like me, you’ll have it installed in under thirty seconds. Nice. If you want to see what it looks like to run a test or to see the testrunner, you can run npx cypress open in your terminal. If you do that, you should see a screen that looks like this:
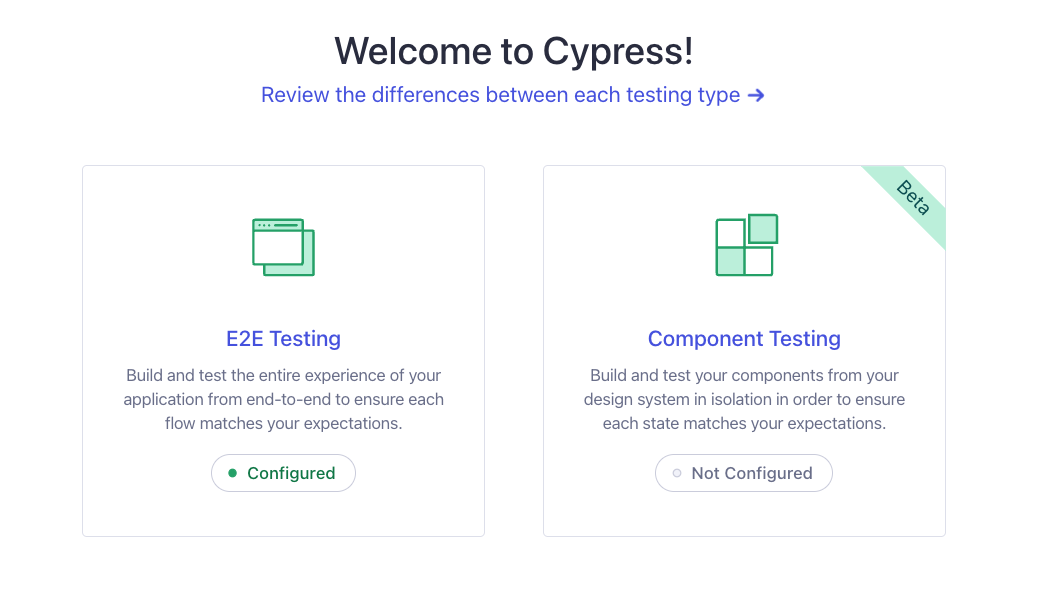

We’re working on E2E (End-to-End) Testing, so choose the tile on the left. Following that screen, select Chrome to run your tests. You’ll see there are several tests already there. But where did they come from?
Well, if you navigate over to your code editor, you’ll see there’s now a Cypress folder at the root of your project. You'll see two example folders. Open the Cypress folder and select the e2e subfolder. Each of those folders has examples you can look through to help you to understand better what tests could and should look like. Feel free to explore, but we’re going to start by identifying the parts of a test, and, apologies, we’ll talk a little bit about English grammar along the way.
Parts of a Cypress Test
Testing is similar to diagramming a sentence. Ok, so you might have groaned, but it’s not as bad as diagramming a sentence. All you need to identify is the subject and verb, or what you’re testing and the action you’re testing.
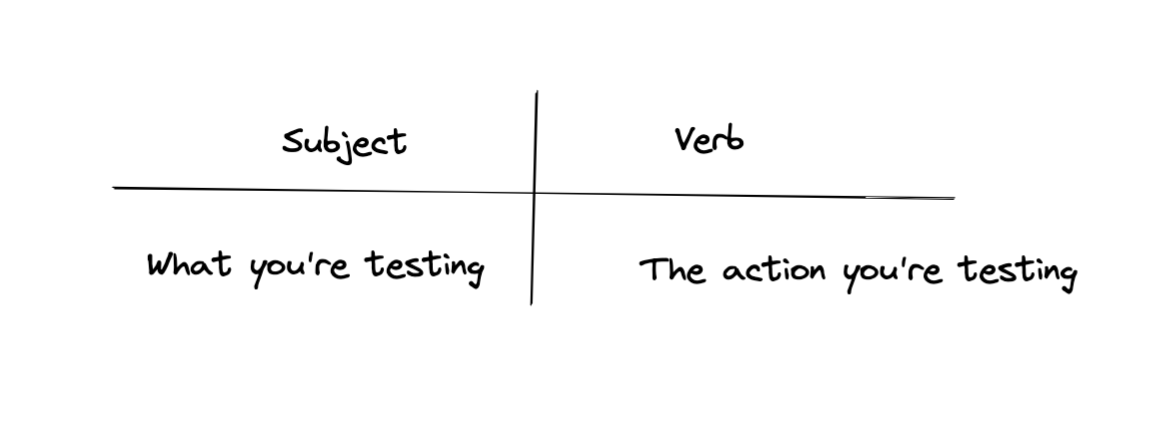

Let’s look at an example from the preloaded tests and then break this down a little more.
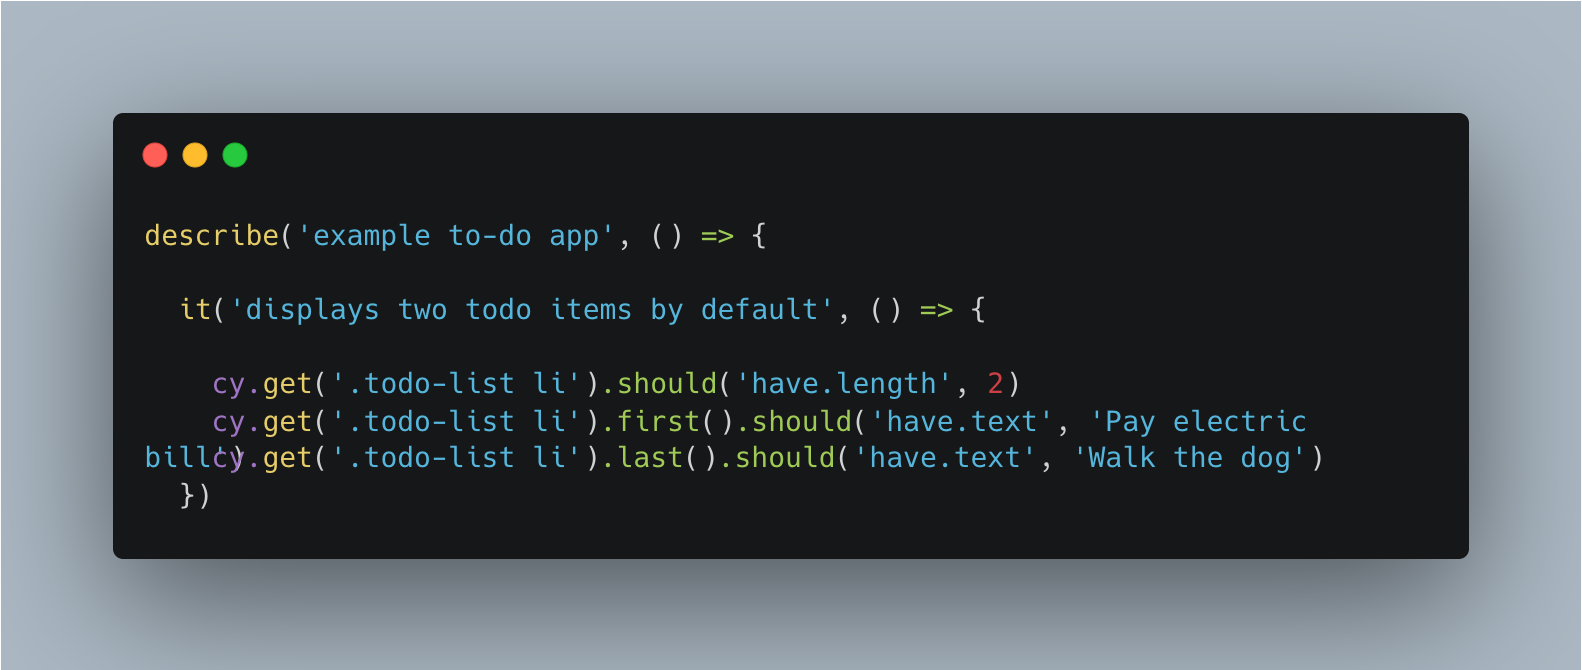

Describe
The describe block is the container for all tests for one particular thing. In this case, that thing is “example to-do app.” This is the subject part of the diagram.
It
The “it” block is a container of a single test and the verb portion. What is the action that you’re testing? In this case, we’re testing that the example app “displays two todo items by default.”
There can be multiple tests or it blocks within the describe block. In fact, in the examples that Cypress preloads in our React project, we see six examples taking us through the flow of the user’s actions. We’re not going to get into what you should test here, but it’s worth noting that you shouldn’t be testing everything. The point of writing tests is to ensure the user can use the software the way they expect and that your software is reliable.
Adding more power
One of the great parts of learning Cypress is that it’s really readable. Without much experience, you should be able to go through Cypress tests and understand what the tests are testing for. To make them even more readable and to give us some extra commands, I like to add Cypress Testing Library: “Cypress Testing Library allows the use of dom-testing queries within Cypress end-to-end browser tests.”
In your terminal, run npm install --save-dev cypress @testing-library/cypress to add to our testing toolbox.
Writing our first End to End test
Now that we have a general understanding of what the parts of the test are, we’re going to write our first test for our React application. In the cypress > e2e folder, create a file called affirmation.cy.js.
We know we need to start with our describe. We’re testing our affirmation app, so let’s keep this simple:
You may have noticed in the examples that there’s a beforeEach function. If there’s an action that will happen before all of your tests, you can add that function before your tests.
In our case, we’ll visit http://localhost:3000/ before every test we write. Let’s add that in before our first test.
We’re ready to write our first test. Our application must render, so we’re going to start there.
Well, we have the two parts that I said we needed. Now what? We need to add some assertions. Assertions are the points that we’re testing for. We want to know that the application renders, and that buttons exist and work the way we expect. Below is the commented code we’ll use to test those things.
Go ahead and save your work. If you’re not currently running the test runner, go ahead and run npx cypress open and go through the process of opening up tests again. Make sure you’re also running the app. You can do this by running yarn start in your terminal. This time when the testrunner opens, you should see a new file affirmation.cy.js. Go ahead and select that file.
Our test passes in the testrunner! But this isn’t the best test to demonstrate how exciting the test runner is. Let’s write one more test showcasing some actions we can see in the testrunner.
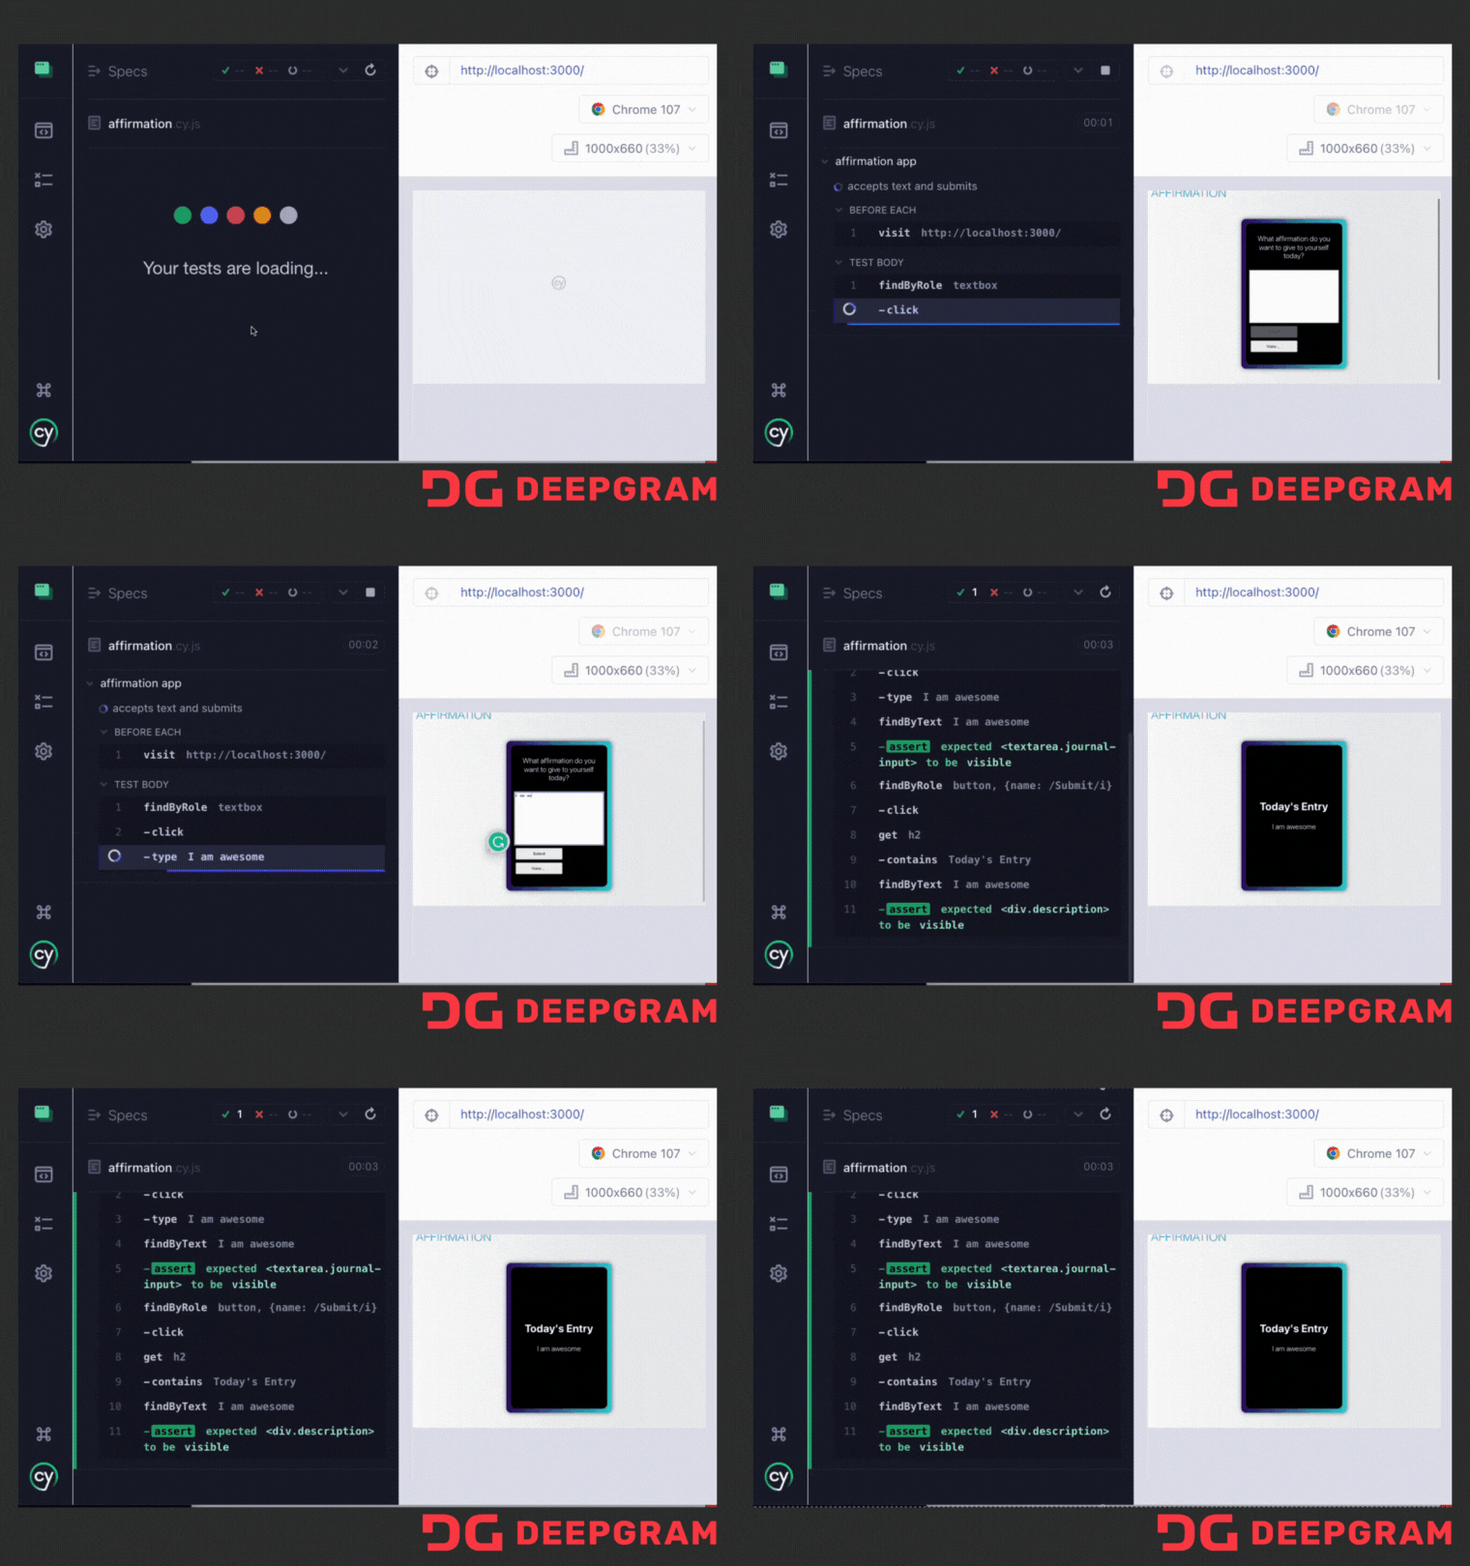
In the textbox, we’re going to type the affirmation “I am awesome,” submit, and then see the change that occurs. This time, we only want to run the new test to see that it works. To do this, we’ll add a .only to the it.
Check out that testrunner! You can see the actions happening. You might not be as excited as I am, but when your tests fail, and you don’t know why, the test runner can make a huge difference in understanding what’s happening.

If you want to see the full version of the tests we’ve written today, go to the GitHub Repository for react-app and select the branch called feature/cypress-tests. If you have questions or comments about this post or want to see us write about something else, drop your idea in our blog post ideas discussion thread.
Learn more about Deepgram
Sign up for a Deepgram account and get $200 in Free Credit (up to 45,000 minutes), absolutely free. No credit card needed!
We encourage you to explore Deepgram by checking out the following resources:
Unlock language AI at scale with an API call.
Get conversational intelligence with transcription and understanding on the world's best speech AI platform.


